Video: How To Fix White Balance Issues With Infrared Photos In Adobe Lightroom

Over the years, as I gain more experience shooting digital infrared images, I continue to find new ways to get the most out of my raw camera data. I’ve recently started using Photoshop and Lightroom again after nearly three years of exclusively using Affinity Photo and I almost forgot about how Adobe products just don’t like IR photos. No matter what you do without some outside help, Lightroom can never seem to display a proper white balance.

I’ve put together a little tutorial video explaining my solution to this problem which you can watch below. The solution revolves around creating custom color profiles using the Adobe DNG editor.

I hope this tutorial can help anyone struggling with this issue. Have a wonderful day and happy shooting.

Refining An Old Technique – Editing Infrared Photos With Affinity Photo

As I have stated previously, I have been looking to distance myself from the Adobe Creative Suite for quite some time now. Over the past few months I have made the bold decision to move to a completely new computer with no Adobe software installed at all. In it’s place I have been using a combination of Affinity Photo and Luminar 3. As of this moment I have my fair share of complaints about Luminar, although I can’t say the same for Affinity.

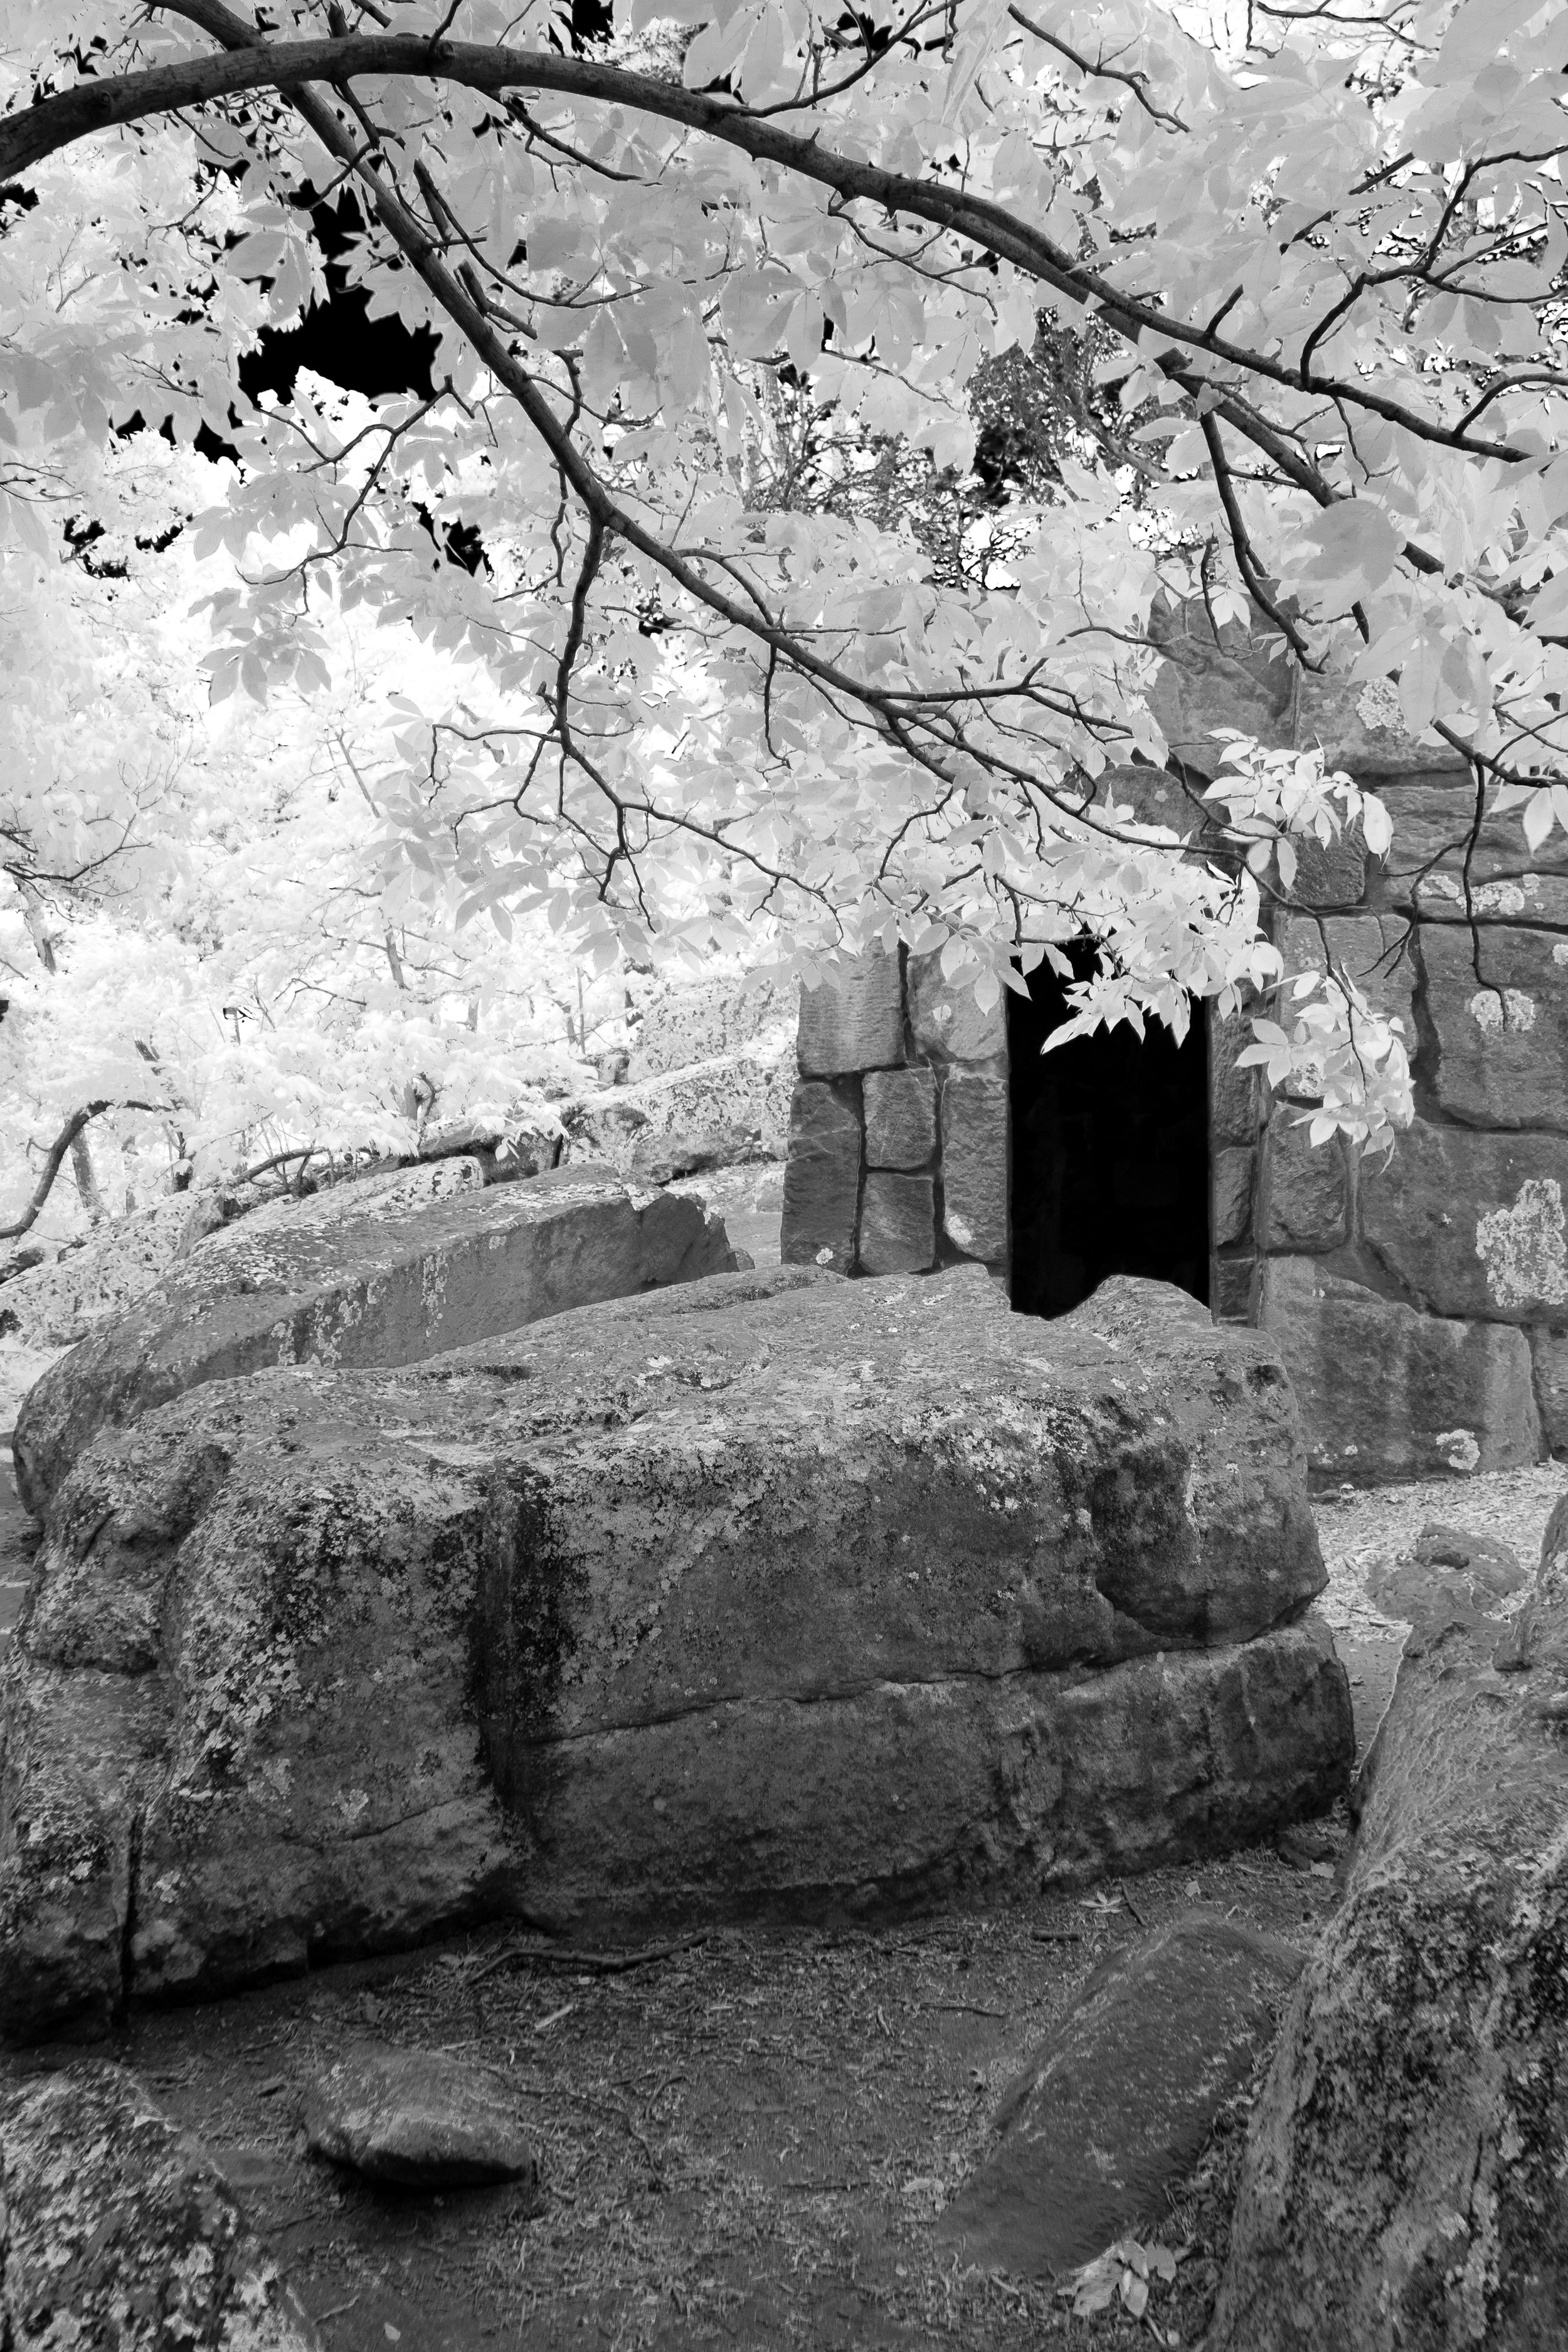
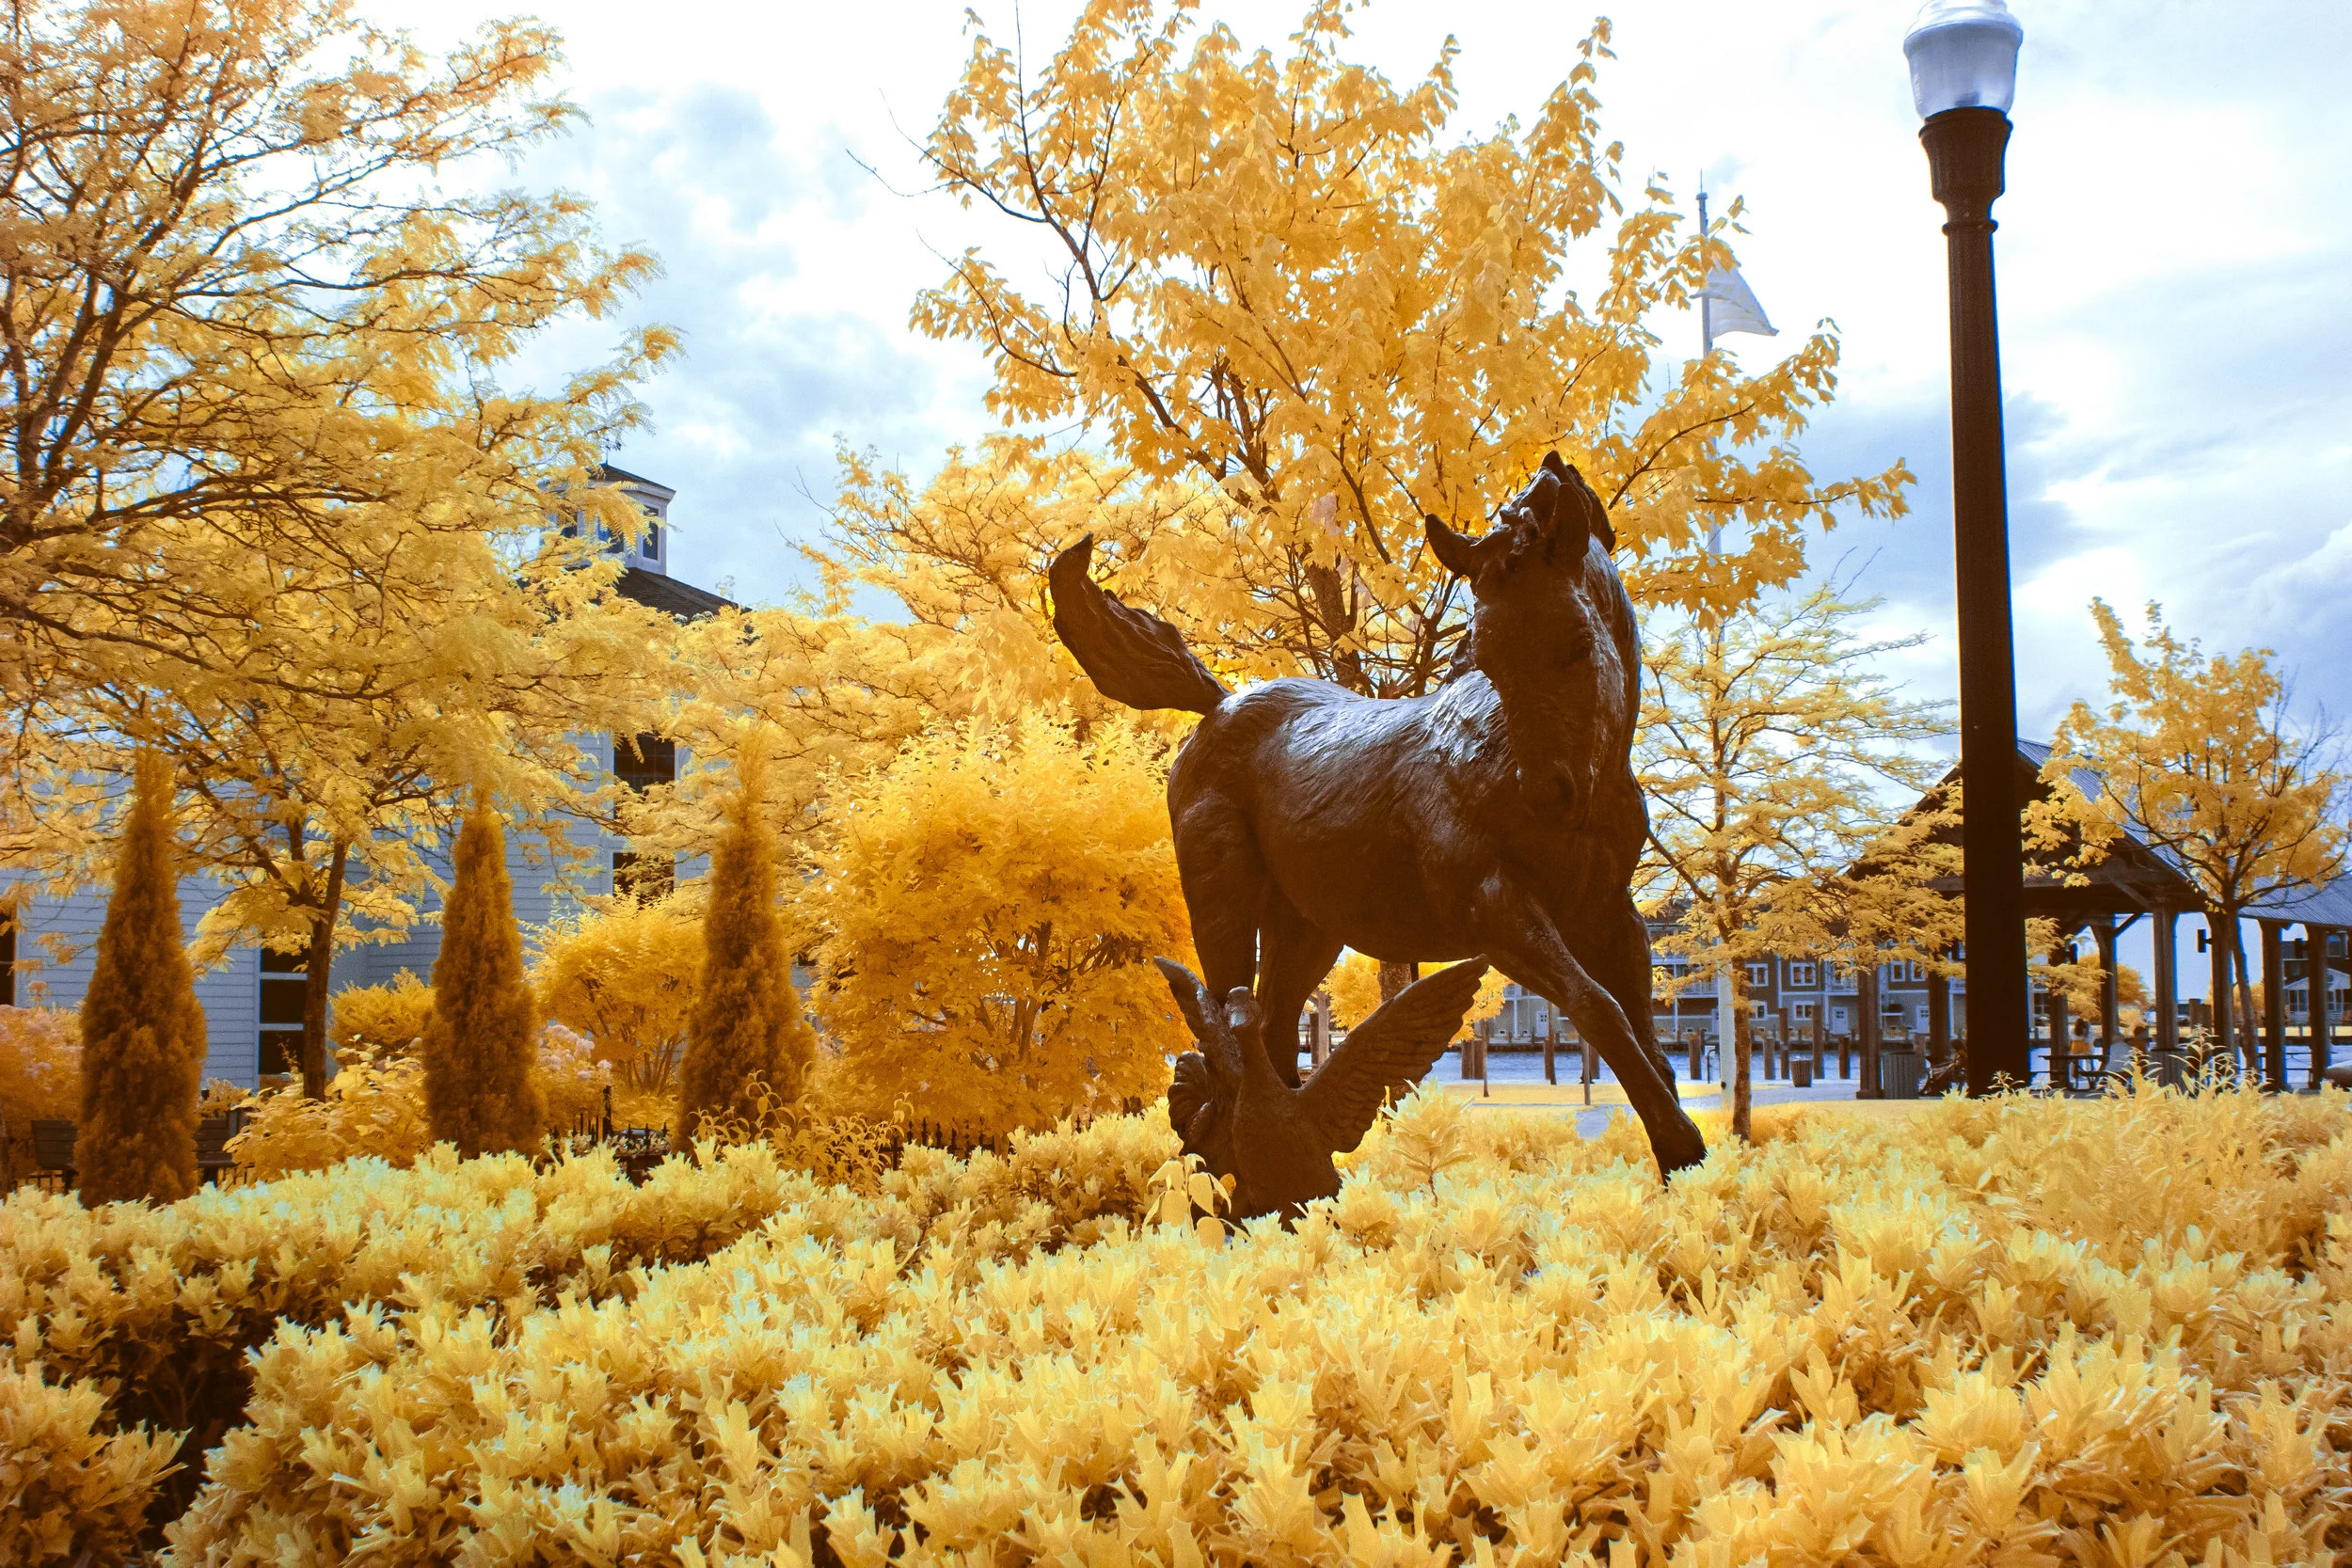
Affinity Photo is an affordable alternative to Photoshop that is incredible for it’s price range. I won’t go into too much detail seeing as this is not a review, but I can say I am having an incredible time learning to use it. Seeing as it is almost time to start taking my infrared camera out, I figured it would be good to practice editing my IR photos with Affinity. At first I thought it was going to be more difficult than in Photoshop, however it turned out to be even easier.

My process for editing IR photos has always been a little complicated ever since I started this little project. For years I have had the unfortunate pleasure of being stuck using an outdated version of Photoshop and Lightroom. My reasoning was pretty rational, I didn’t want to pay a monthly subscription fee for Creative Cloud. As a result I have been stuck using Photoshop CS6 ever since 2012.

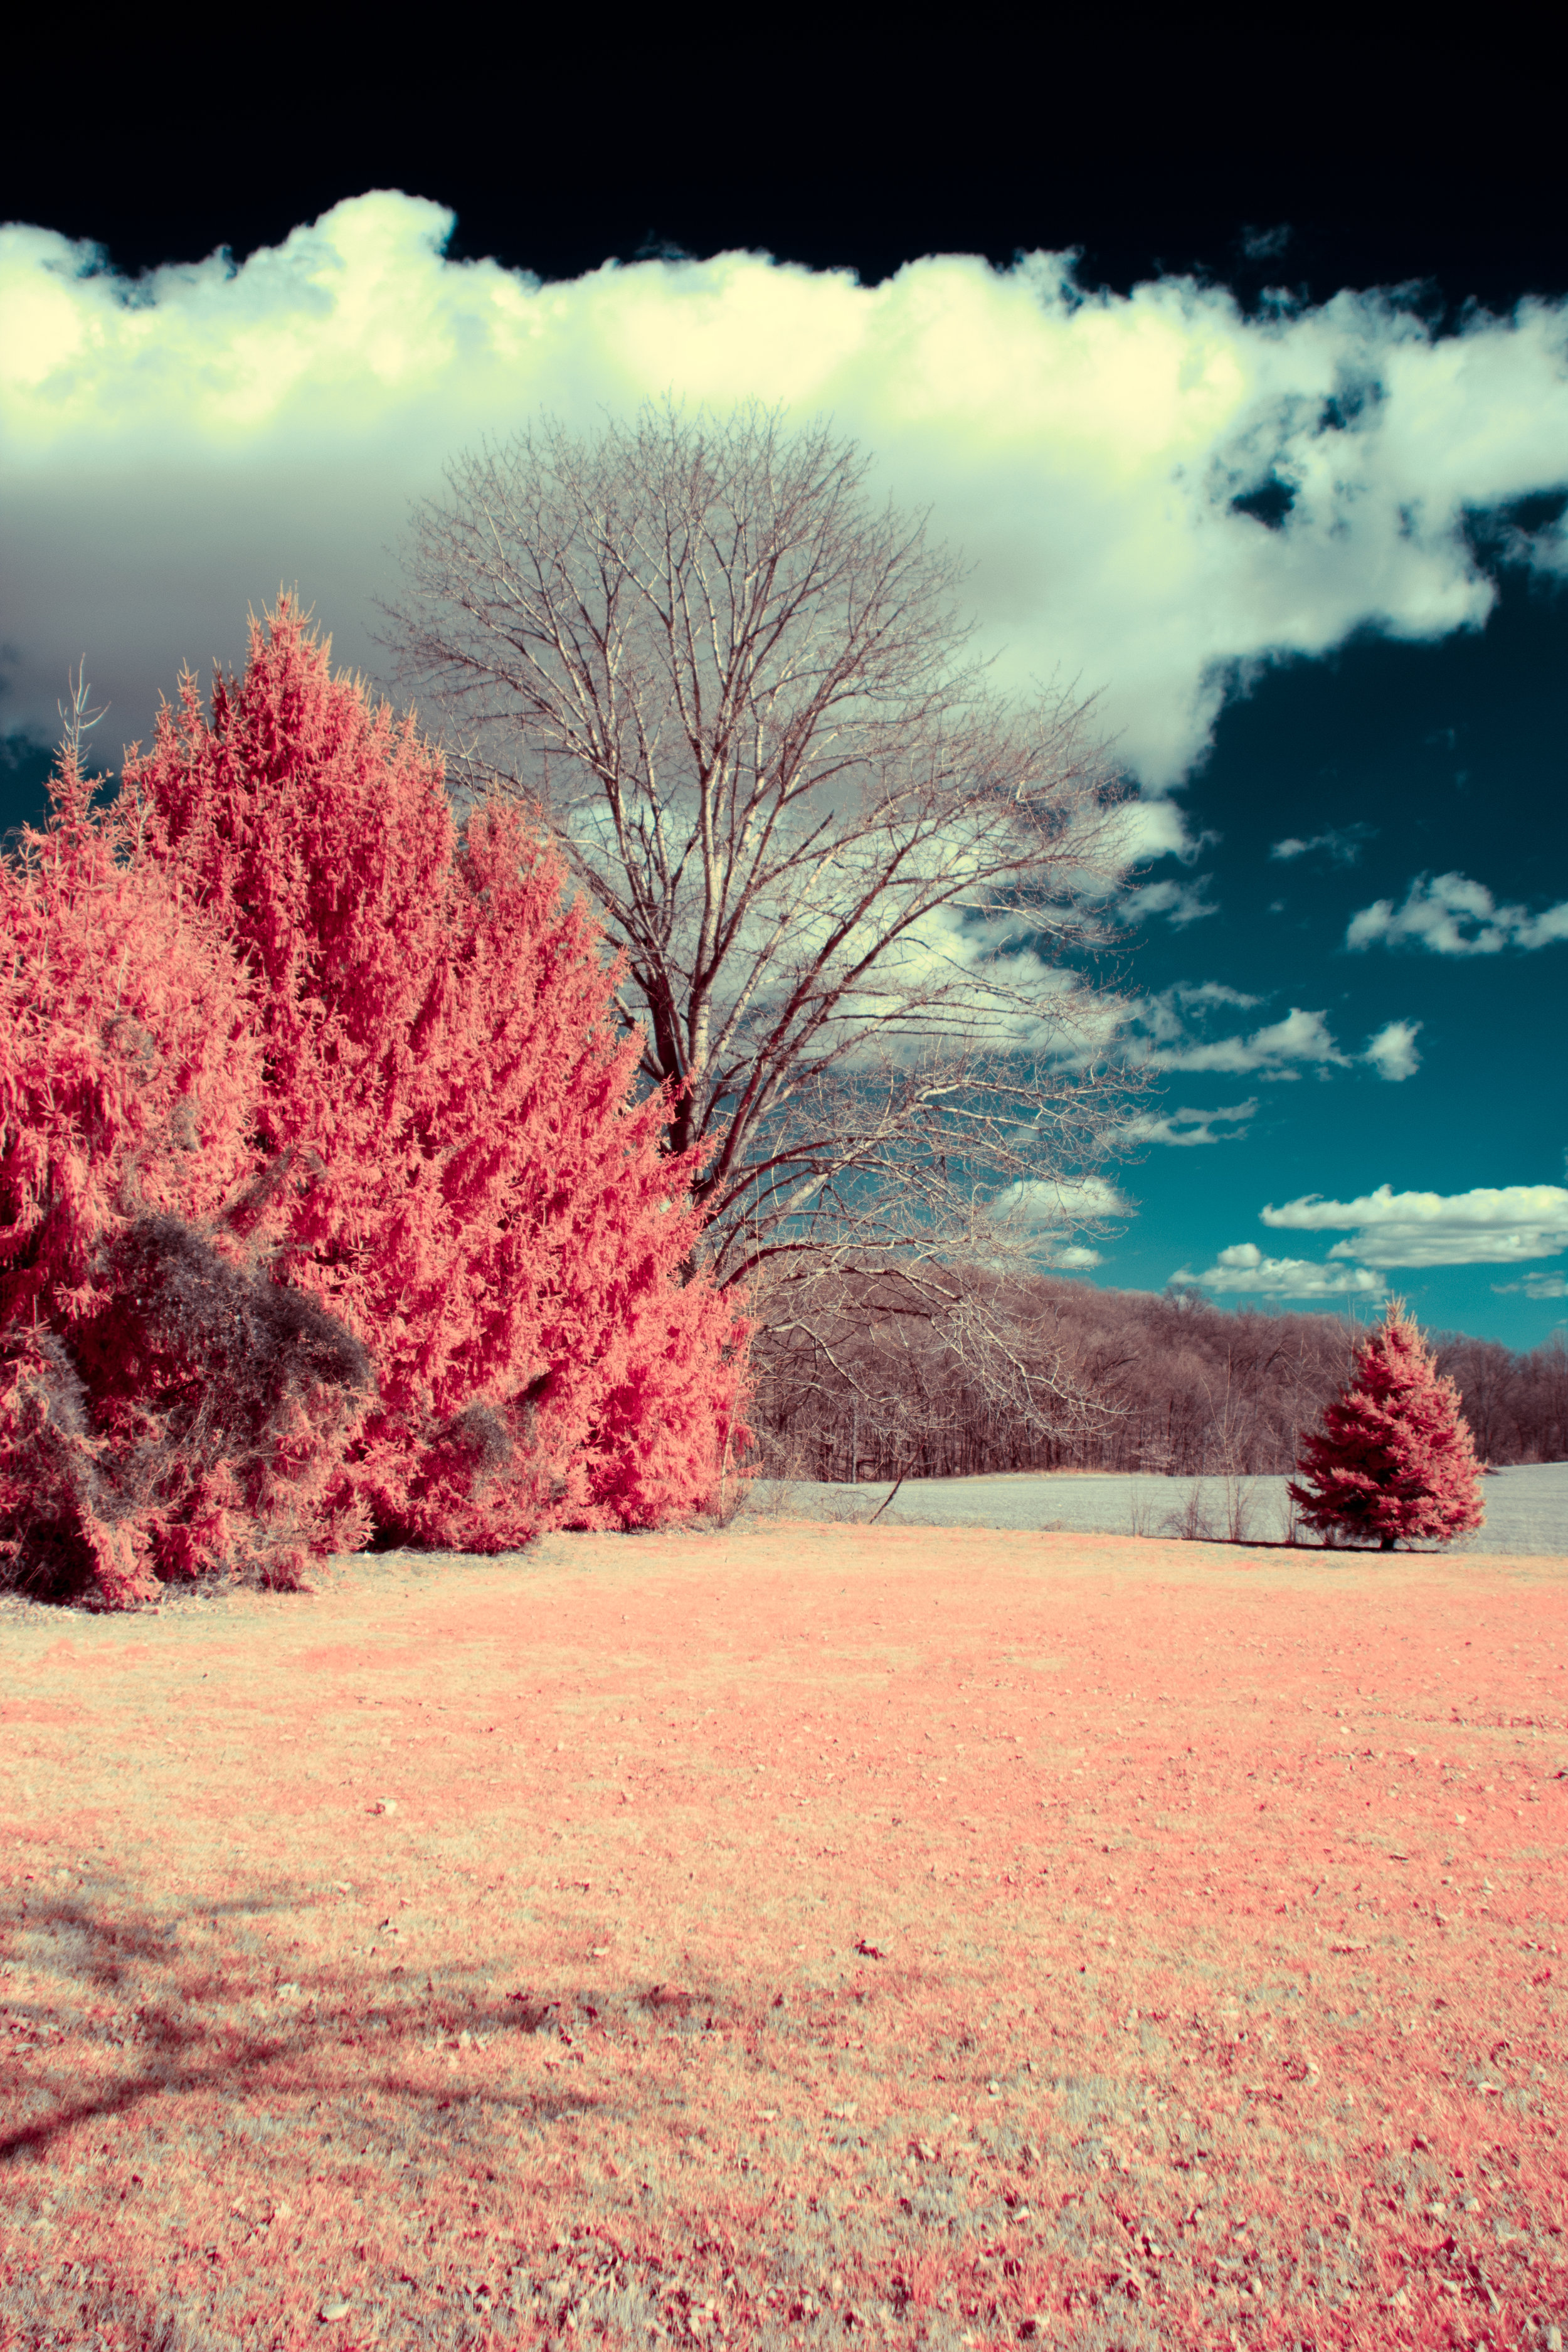
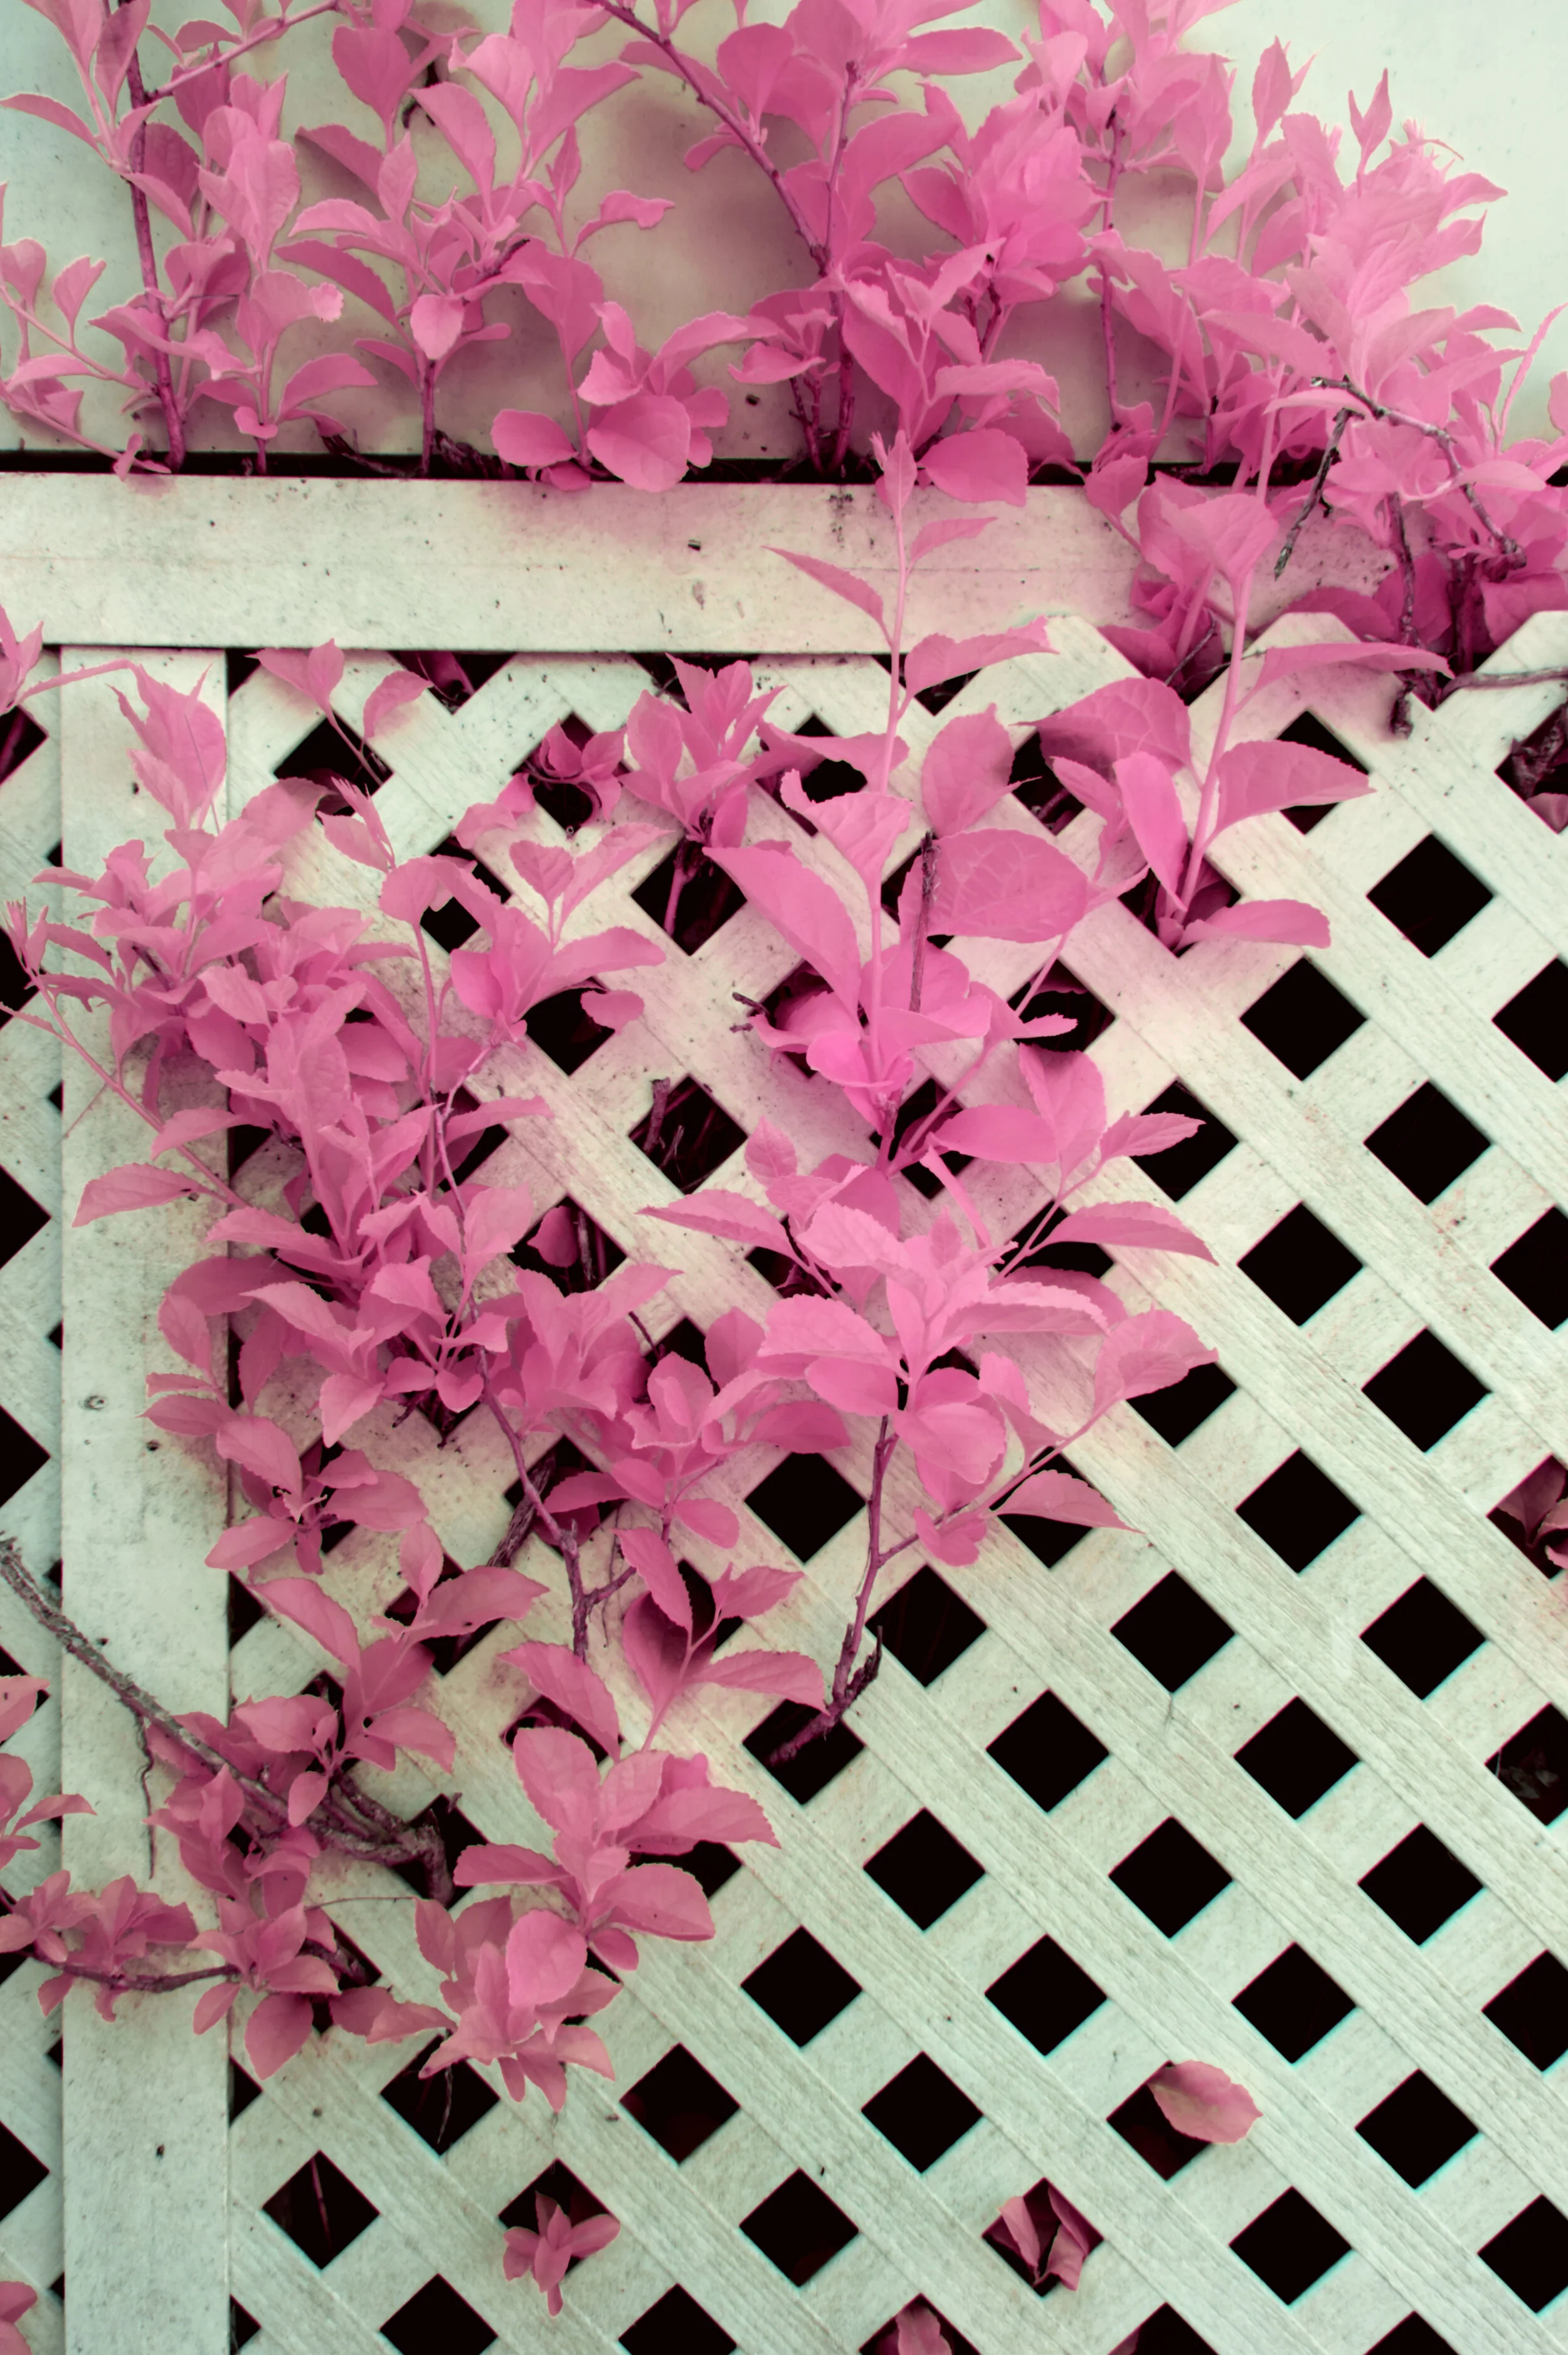
Naturally, using outdated software was starting to show it’s drawbacks. For example, Photoshop CS6 wasn’t capable of recognizing the white balance information from my Canon .CR2 files. Indeed I would set my white balance in camera and than import the file into Photoshop, once imported all of my settings were instantly wiped. This is especially frustrating for someone using a custom white balance with infrared in mind. The resulting images were plagued with too many red tones. It got so bad that the default white balance presets in Photosohp were not strong enough to correct the problem. I ended up having to download an external program in order to create a custom white balance preset just to be able to view the file as it was shown in camera. On top of that, my outdated software didn’t even recognize my newer .CR2 files coming off of my Canon T5. This required me to use yet another additional piece of software to convert my .CR2’s to .DNG’s. Needless to say, I was finished.

In camera white balance (Left) VS Output DNG (Right).

In camera white balance (Left) VS Output DNG (Right).

Upon switching to Affinity photo all of these problems were instantly solved. My newer files were recognized, with the correct white balance at that! There was no need for additional software to fix any issues. It even managed to handle color correction better. I can easily say that something that used to take my 45 minutes to finish with Photoshop and Lightroom now only takes 15. I am ecstatic.

The Affinity develop module (similar to Adobe Camera RAW) although good, doesn't quite compare. This however is totally forgivable when I can easily develop presets to conduct my red/blue channel swap. I know this could be done easily with Photoshop, however I just really like the way it is handled in Affinity Photo. For everything that Affinity lacks, it more than makes up with how it improves my workflow. Throughout the year I plan to devote more time to exploring Affinity Photo. Who knows, I might even create some tutorials in order to help people switch.

Today’s photos were just an exercise in order to familiarize myself with my new workflow. I will include my final results below. I feel like these look very nice considering I was trying out completely new software. As always, I hope you enjoy.

I have been hard at work on other projects as of late. I have a new website dedicated to exploring books and history. Feel free to check it out at http://topshelfbookclub.com .

Previous posts about Infrared Photography:

A CAMERA THAT SHOOTS INFRARED - A BRIEF GUIDE TO IR PHOTOGRAPHY - SAMPLE IMAGES – 3/2/17

INFRARED NATURE WALK – 5/3/17

INFRARED LANDSCAPES 5/2/19 - INFRARED PHOTOGRAPHY

Previous posts about switching from Adobe:

ON THE ROAD TO DITCHING ADOBE. A REVIEW OF LUMINAR 3, A SENSIBLE REPLACEMENT FOR LIGHTROOM.

[Photo's] - Memorial Day IR Walk.

This weekend I took a little vacation. I only managed to take a few photos, but I had a lot of fun taking them. I hope you all enjoy.

Infrared Nature Walk - 5/3/17

Today I decided to take my new modified infrared camera out for a test run.

Every image shown below was shot in infrared using a modified Canon T5 and processed in Photoshop and Lightroom. 

I am still trying to perfect my processing technique, as a result some images may look better than others. One thing I noticed during processing was the amount of possible results. It seems like you have to be very precise with your adjustments, otherwise you will end up with a completely different result.

I may or may not revisit some of these images in the future, however I am happy with the results for the time being. 

I hope you enjoy the images. As always any feedback is always greatly appreciated. 

Click on any image to enlarge. 

A Camera That Shoots Infrared - A Brief Guide to IR Photography - Sample Images - 3/2/17

After two years of experimentation with mixed results I've finally decided to bite the bullet and purchase an infrared converted camera. 

I have had an obsession with infrared photography for the better part of two years now. Ever since I took my first few shots, I knew I could have a lot of fun with this new method of shooting. As I kept on practicing, my results kept getting better and better eventually resulting in images such as Dreamland. A few other examples of some IR shots can be found at the following two posts. 

IR images from 7/3/15.

IR images from 7/28/15.

However, up until recently I have been severely limited in what I can achieve due to the technical aspect of shooting infrared images. 

Technically these photos are not pure infrared. They are a mixture of visible light and a small amount of infrared light that exist outside the perception of the human eye. So in essence they are near infrared images. A few different methods exist to capture these types of images. Up until now I have been using a $70 Hoya Infrared Filter. 

These filters are designed to be attached to standard DSLR cameras. The disadvantage with this method is that standard cameras have a filter in front of their sensors that prevent any IR light from hitting the sensor. Filters like the Hoya IR filters block out visible light and allow the IR light to reach the sensor. However getting a useable image requires a ridiculously long exposure. 

This little handicap comes with its own set of problems. All of which I will explain at a later date. It is these handicaps however, that convinced me to buy a camera dedicated specifically to shooting in IR. 

The other more expensive alternative to the Hoya filters is to have a camera converted to only shoot in IR. The downside to this is that you can only use that camera to shoot IR photos. However if you are serious about shooting infrared, you can never go wrong with a camera conversion. 

There are a handful of ways to obtain an IR converted camera. One is to have an old camera converted by services such as LifePixel. Although LifePixel is a great service, I personally didn’t feel like going through all the unnecessary work that it requires. 

Instead I decided to purchase a camera that was already converted off of eBay. I was able to find someone who sells cameras brand new with the IR conversion already applied. So rather than having to worry about all the technical details myself, I just purchased one that was already done. 

The specific model I got was a Canon T5 or 1200D for those outside of North America. 

I was genially surprised by the quality of the camera. It arrived in pristine condition, almost like new. Im actually pretty sure it was new and only used for testing. The battery and charger were even sealed in their packaging completely untouched. In addition to the camera a CD was included with a set of tutorial video’s and guides just incase you need help learning how to shoot infrared. 

After attaching a lens, I set the camera to RAW and than I was ready to soot. 

At some point in the future I intend to create an all purpose guide to shooting in infrared. So if you are looking for a tutorial, that will probably be released this summer. However today I just want to share some test shots from my first day with the camera. I am still learning the basics of how to shoot with this particular camera. As you can imagine it is very difficult to shoot photos using light that you cannot see normally. It will also take some time to perfect my post production process, but I will improve with time. 

The following image is a pure unedited JPEG that was white balanced in camera. I’ve included this so you can get an idea of what I was seeing through my live view screen. 

These two images are the ones I was the most proud of. I think I really nailed the post production on these ones. 

The following images are to test how the IR light affects human skin. I basically just pointed the camera at myself, so I didn't expect them to turn out great. All I can say is that you can definitely get some outstanding results when photographing people. Although I need a little more practice. Just for fun I’ve included a few processed images of myself, as well as one unprocessed. 

These final images are the other leftovers that are not to bad and not to good. I mainly included them to showcase the rest of my tests.  

Overall I am very happy with my new camera and I cannot wait until the leaves come out in the spring. Once spring comes along I will take some fantastic IR landscapes. 

I can’t wait to share more IR photos with everyone. At some point I plan on making a guide to IR photography, and it will most likely be a video. Definitely let me know what you would like to see in that. 

As always I thank everyone for taking the time to read the blog. Let me know what you think of the images, and have a good day. 


"The Energy Of The Forest" - Photo Manipulation - 10/12/16

Today I decided to experiment with some new photo manipulation techniques. The goal was to create an image of a jar radiating what would appear to be mystical energy. The entire purpose of this project was to gain experience with creating artificial light sources during post production. 

Overall I am very pleased with the resulting image and hope to use this technique in future projects. 

If you are interested in a tutorial on how I achieved this effect, feel free to leave a comment down below. As always any feedback would be greatly appreciated. 

"Kaleidoscopic Psychoactivity" - 9/21/16 - [Photomanipulation]

The initial idea behind this photo was to create a colorful poster using the same techniques used in last weeks image

This particular composition is made up of two photographs combined together, along with extensive amounts of photoshop manipulations.

Take a look for yourself.   

I eventually plan on selling large prints of this image, so definitely let me know what you think.

If you have any questions on how the final product came to be, I would be more than happy to elaborate in a video tutorial. 

"Orange Mango" - 9/14/16 - Photo and Video Tutorial

After receiving positive feedback on last weeks photo, I decided to build on the concept and create something a bit more exciting.

The following image is the result of several hours of experimentation. The photo itself is made up of two exposures, one for the background and one for the bottle. Both of which were processed in Adobe Lightroom, and later combined in Adobe Photoshop. The splash effect was later added in the post production process, by liquifying the bottle and than adding several layer masks comprised of various paint splashes.

The final product is shown below. 

In addition, I have also produced a video tutorial detailing the process for creating the splash's. 

[Photo] - "Gone and Still Forgotten" - Re Edit.

Recently Google has made the popular Nik suit of photoshop plugins free to download. I have been looking at this particular plugin suit for quite some time, and now that it's free I figured it's time to give it a try.  

I decided to re edit "Gone and Still Forgotten" to practice using the Silver EFX Pro plugin. 

The following image is the result. 

[Updated Images] - "Sparkling ICE" - "Passing Time"

All of the projects I have posted over the last few weeks have been taken as part of my final portfolio for my photography major. After getting some feedback from one of my professors i've decided to revisit a few of these images. Below are new and improved versions of "Sparkling ICE", and "Passing Time".