New Photos - Winter 2017

Here is a collection of photos I took all through the winter of 2017. I haven't had much time in the studio for the past few months due to various circumstances, however im hoping to get back in the swing of things sometime soon. 

The first is a recent project. Here is a simple product shot of some Pomegranate juice. I have always wanted to do a project with a pomegranate, and I may revisit this shot in the future to maybe add some splashes or something cooler. This could be the start of an interesting set of product shots, so expect more in the future. 

The second set of images is a little project I made for someone very special. Over the past few months this person has been struggling with severe depression and was even hospitalized for an entire month due to various different conditions. During her stay she informed me about Project Semicolon, this set of images was my way of providing support. 

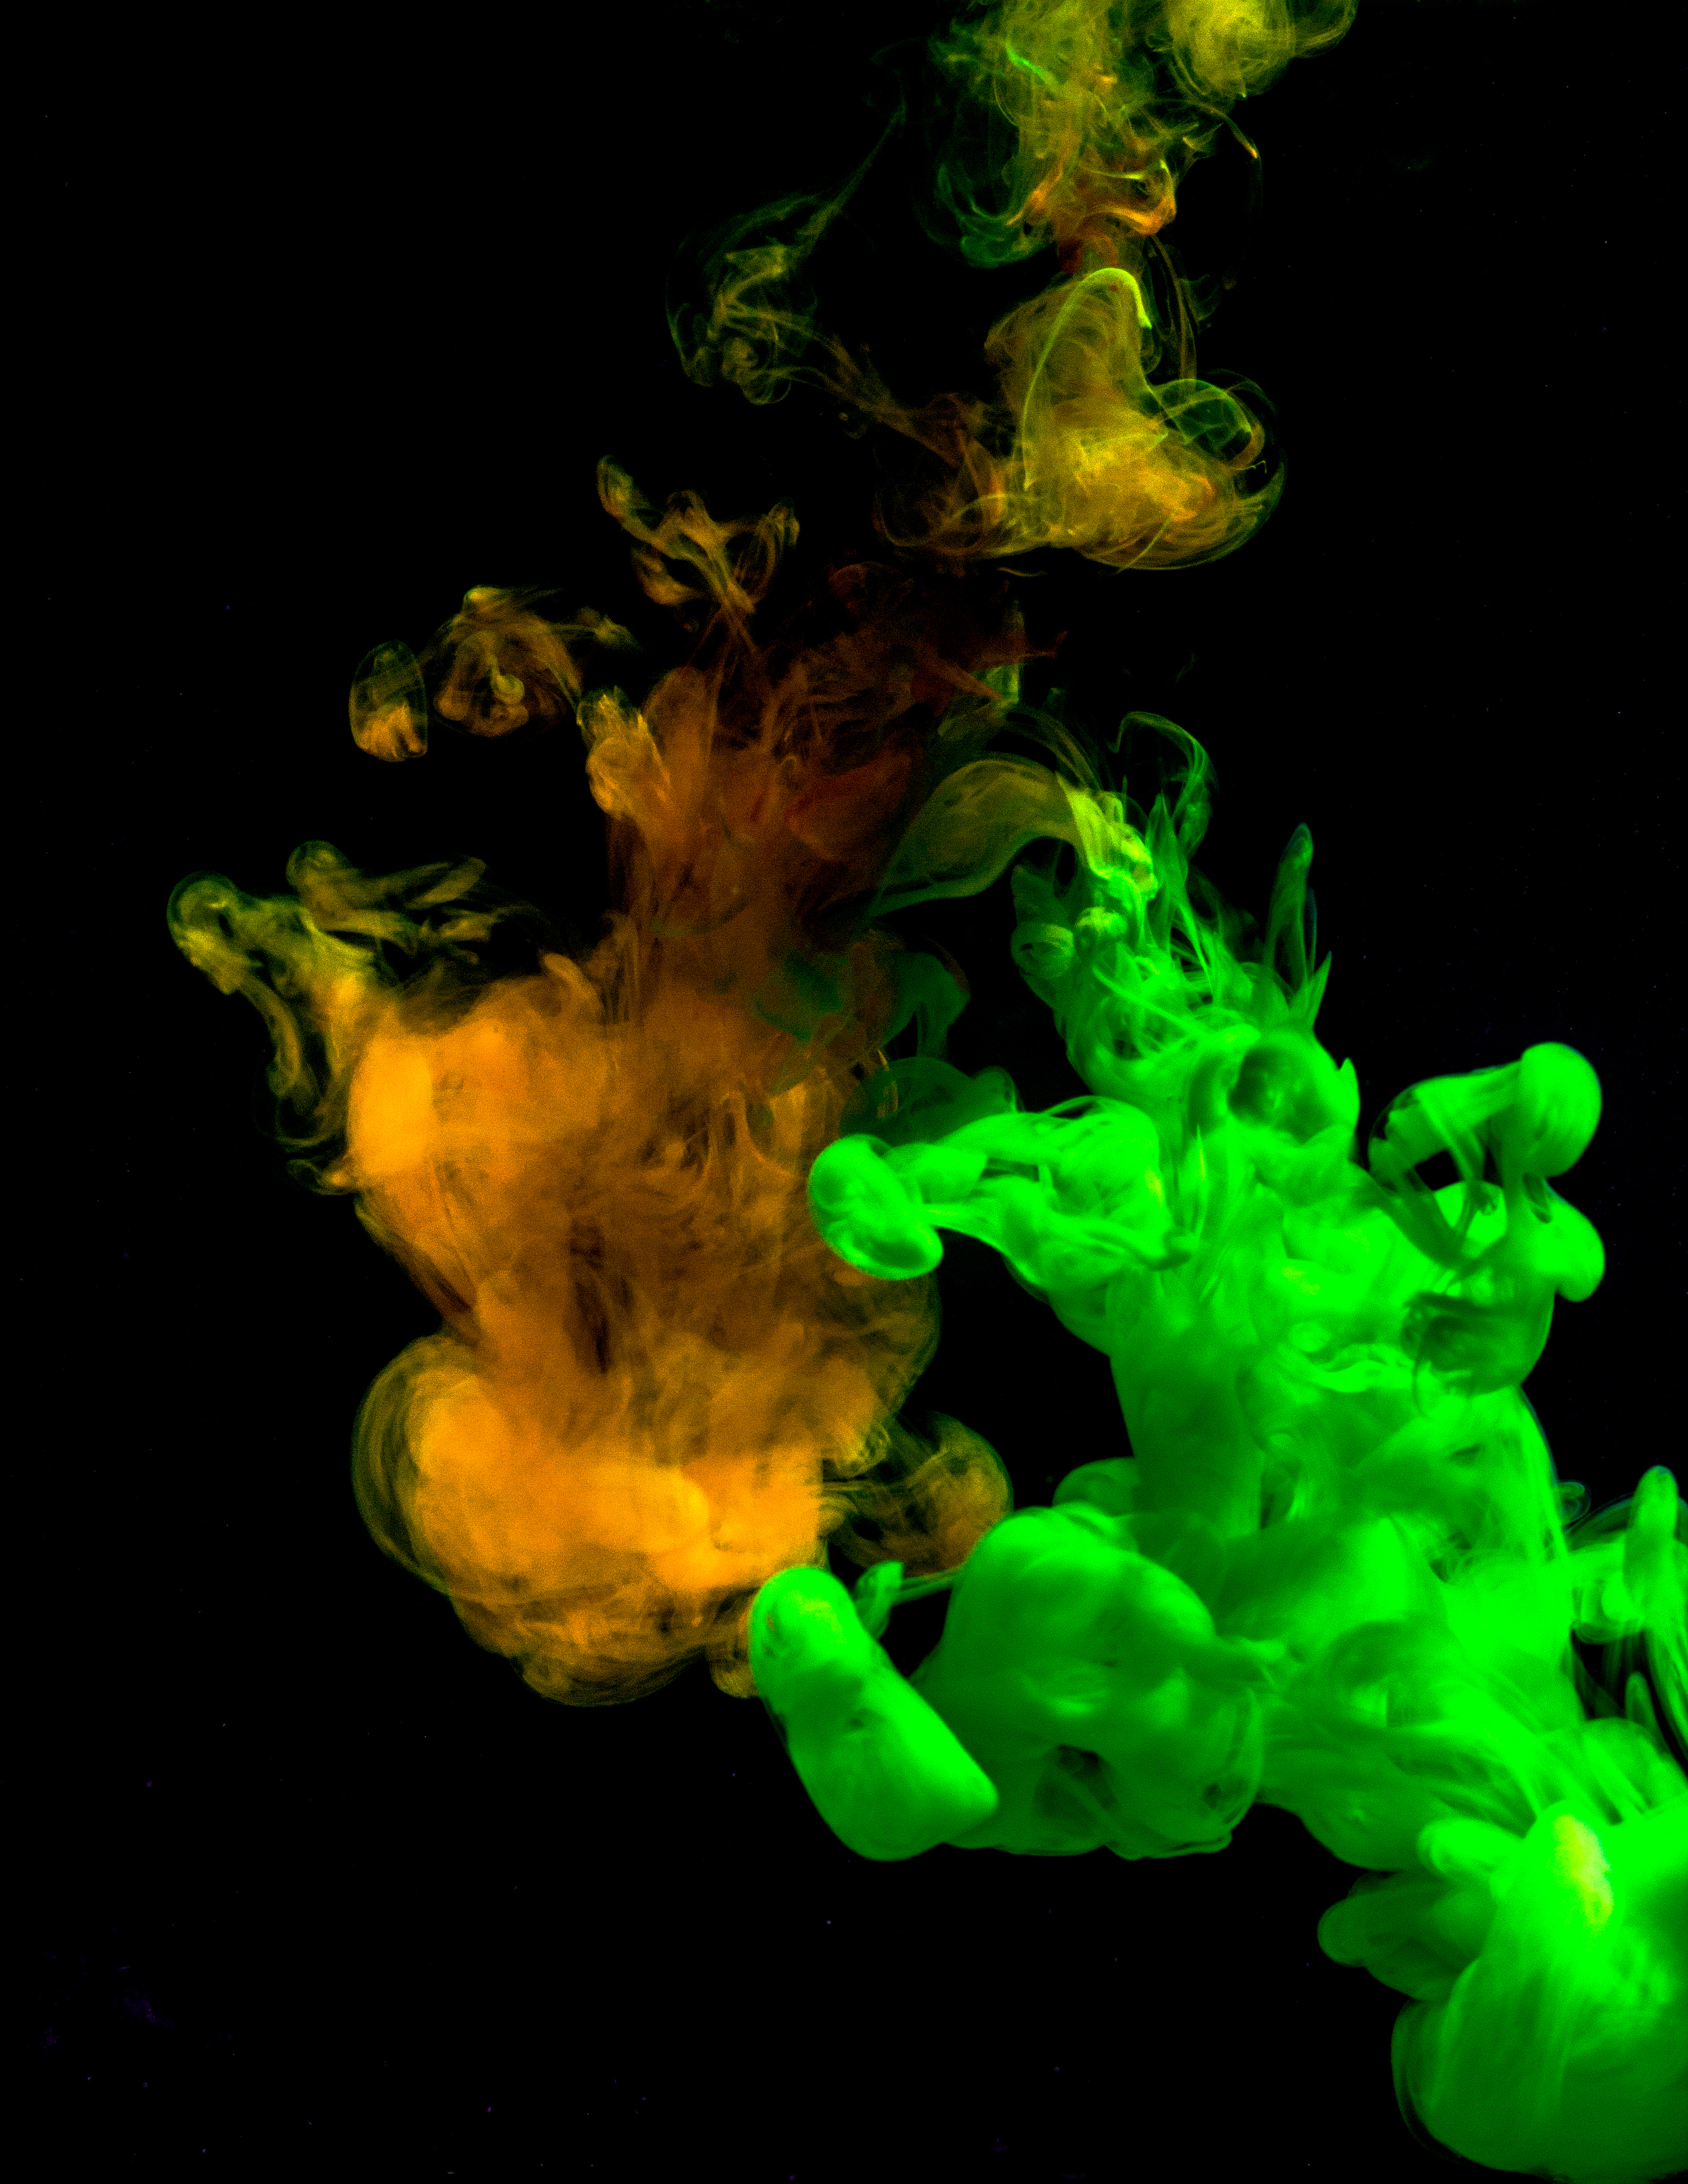
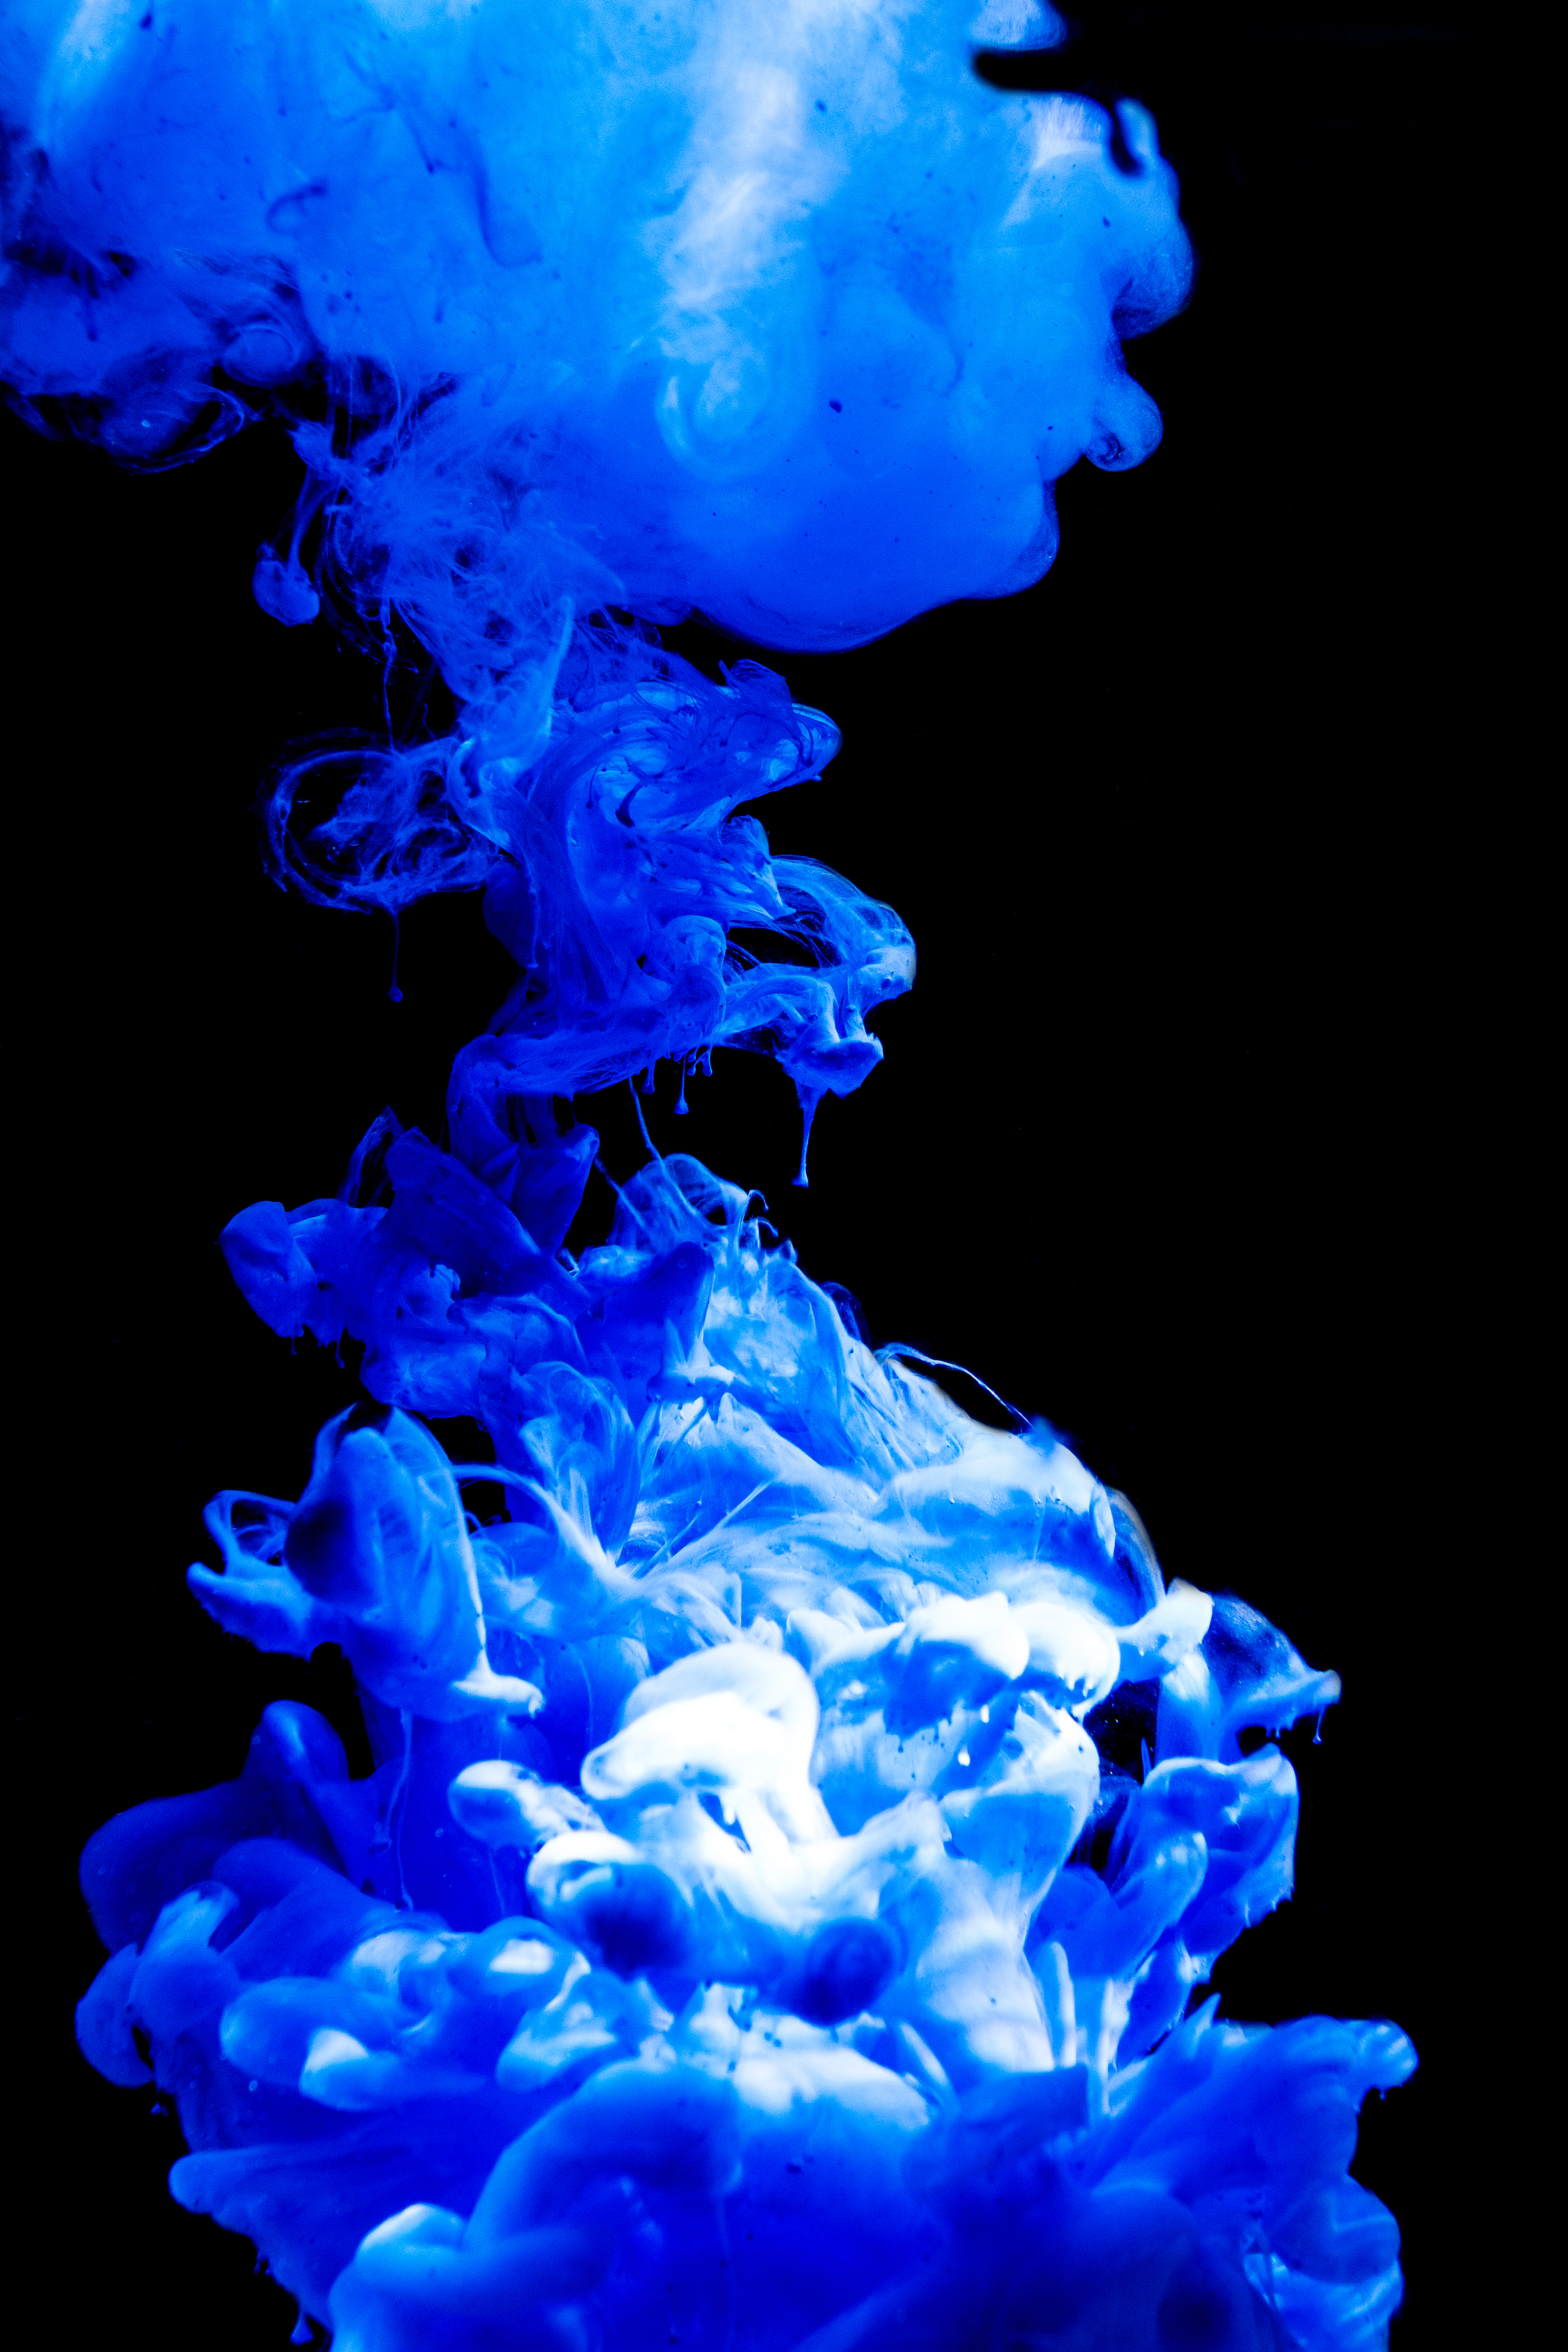
The final composition is made out of about a dozen different shots of different colored liquid frozen in mid air. We achieved this result by applying food coloring to heavy cream and tossing it in the air, freezing the image with my flash. This project was incredibly fun to shoot, and we had a lot of fun producing the raw images. I will include the final image as well as two of the best raw images in the slideshow below. 

Infrared Nature Walk - 5/3/17

Today I decided to take my new modified infrared camera out for a test run.

Every image shown below was shot in infrared using a modified Canon T5 and processed in Photoshop and Lightroom. 

I am still trying to perfect my processing technique, as a result some images may look better than others. One thing I noticed during processing was the amount of possible results. It seems like you have to be very precise with your adjustments, otherwise you will end up with a completely different result.

I may or may not revisit some of these images in the future, however I am happy with the results for the time being. 

I hope you enjoy the images. As always any feedback is always greatly appreciated. 

Click on any image to enlarge. 

A Camera That Shoots Infrared - A Brief Guide to IR Photography - Sample Images - 3/2/17

After two years of experimentation with mixed results I've finally decided to bite the bullet and purchase an infrared converted camera. 

I have had an obsession with infrared photography for the better part of two years now. Ever since I took my first few shots, I knew I could have a lot of fun with this new method of shooting. As I kept on practicing, my results kept getting better and better eventually resulting in images such as Dreamland. A few other examples of some IR shots can be found at the following two posts. 

IR images from 7/3/15.

IR images from 7/28/15.

However, up until recently I have been severely limited in what I can achieve due to the technical aspect of shooting infrared images. 

Technically these photos are not pure infrared. They are a mixture of visible light and a small amount of infrared light that exist outside the perception of the human eye. So in essence they are near infrared images. A few different methods exist to capture these types of images. Up until now I have been using a $70 Hoya Infrared Filter. 

These filters are designed to be attached to standard DSLR cameras. The disadvantage with this method is that standard cameras have a filter in front of their sensors that prevent any IR light from hitting the sensor. Filters like the Hoya IR filters block out visible light and allow the IR light to reach the sensor. However getting a useable image requires a ridiculously long exposure. 

This little handicap comes with its own set of problems. All of which I will explain at a later date. It is these handicaps however, that convinced me to buy a camera dedicated specifically to shooting in IR. 

The other more expensive alternative to the Hoya filters is to have a camera converted to only shoot in IR. The downside to this is that you can only use that camera to shoot IR photos. However if you are serious about shooting infrared, you can never go wrong with a camera conversion. 

There are a handful of ways to obtain an IR converted camera. One is to have an old camera converted by services such as LifePixel. Although LifePixel is a great service, I personally didn’t feel like going through all the unnecessary work that it requires. 

Instead I decided to purchase a camera that was already converted off of eBay. I was able to find someone who sells cameras brand new with the IR conversion already applied. So rather than having to worry about all the technical details myself, I just purchased one that was already done. 

The specific model I got was a Canon T5 or 1200D for those outside of North America. 

I was genially surprised by the quality of the camera. It arrived in pristine condition, almost like new. Im actually pretty sure it was new and only used for testing. The battery and charger were even sealed in their packaging completely untouched. In addition to the camera a CD was included with a set of tutorial video’s and guides just incase you need help learning how to shoot infrared. 

After attaching a lens, I set the camera to RAW and than I was ready to soot. 

At some point in the future I intend to create an all purpose guide to shooting in infrared. So if you are looking for a tutorial, that will probably be released this summer. However today I just want to share some test shots from my first day with the camera. I am still learning the basics of how to shoot with this particular camera. As you can imagine it is very difficult to shoot photos using light that you cannot see normally. It will also take some time to perfect my post production process, but I will improve with time. 

The following image is a pure unedited JPEG that was white balanced in camera. I’ve included this so you can get an idea of what I was seeing through my live view screen. 

These two images are the ones I was the most proud of. I think I really nailed the post production on these ones. 

The following images are to test how the IR light affects human skin. I basically just pointed the camera at myself, so I didn't expect them to turn out great. All I can say is that you can definitely get some outstanding results when photographing people. Although I need a little more practice. Just for fun I’ve included a few processed images of myself, as well as one unprocessed. 

These final images are the other leftovers that are not to bad and not to good. I mainly included them to showcase the rest of my tests.  

Overall I am very happy with my new camera and I cannot wait until the leaves come out in the spring. Once spring comes along I will take some fantastic IR landscapes. 

I can’t wait to share more IR photos with everyone. At some point I plan on making a guide to IR photography, and it will most likely be a video. Definitely let me know what you would like to see in that. 

As always I thank everyone for taking the time to read the blog. Let me know what you think of the images, and have a good day. 


[Photo's] - Cards and Dice - 1/18/17

For todays project I wanted to focus on the theme of dice and playing cards. The goal was to create a few simple images that could be used as some kind of backdrop in the future. I wasn't trying to be too serious with this project, it was mainly just for fun. 

The following images are what I came up with. 

Watch Photography Study - 12/28/16

Today I decided to practice some watch photography techniques. The main goal of this project was to create an image that would resemble a magazine ad for a wrist watch. 

The setup for this shot was pretty simple. I attached my watch to a tripod and placed my camera directly above it. As for the lighting I used a single flash which was diffused by a white sheet. Additional light was provided by a flashlight held at arms length in various positions to fill in additional details. 

I ended up with around five shots with lighting set for specific areas of the shot. The shots were then combined in Photoshop in order to create the final image.

There are two different versions of the final image. One with just a plain black background, and the other with a fabric background superimposed in the background.

This project was a lot of fun, and I intend to expand upon it in the coming weeks.

As always any feedback is greatly appreciated. I hope you all have a great day and a great new year.  

Final Image With The Fabric Background.

Final Image With No Background.

"The Energy Of The Forest" - Photo Manipulation - 10/12/16

Today I decided to experiment with some new photo manipulation techniques. The goal was to create an image of a jar radiating what would appear to be mystical energy. The entire purpose of this project was to gain experience with creating artificial light sources during post production. 

Overall I am very pleased with the resulting image and hope to use this technique in future projects. 

If you are interested in a tutorial on how I achieved this effect, feel free to leave a comment down below. As always any feedback would be greatly appreciated. 

How To Transform A Photo Into A Cartoon - Adobe Illustrator Tutorial - 9/10/16

As I was searching through my old hard drive I stumbled across a collection of photos I took in 2013. The images were quite bland and un impressive on their own, however after putting some thought into it I decided that they would make good practice for some image manipulation. 

After a few hours of tweaking in Photoshop I came up with a really cool looking cartoon city scape. 

Click to view in full screen.

The following result was achieved using a combination of Adobe Illustrator and Adobe Photoshop. First I used Illustrator to convert my original photo into a vector graphic, or in other words a cartoon. Afterwards I imported my cartoon into Photoshop and combined it with a few different textures in order to get the result seen above. 

I have created two separate video tutorials detailing my process in its entirety. I will also give a short explanation of the image trace functionality used to transform my photograph into a vector image. 


First I should explain the process of transforming a photo into a cartoon. 

Below I have my original photo. The first thing to do is to import this image into Adobe Illustrator. 

Click to view in full screen.

Once the image is imported, select it using the selection tool (press V on the keyboard). Once selected you should see a tool bar like the one in the image below. 

Click on the arrow next to the image trace button and select one of the following presets. These presets will scan your image and convert it to a vector graphic. 

Each one of these presets will have a different result depending on the contents of the image. I have prepared an example image that has been processed through all of the different image trace presets. Click on the image below to view in full detail. 

After you have selected a preset you like, you will see a few different options in the image trace toolbar. If you want to edit your image further, click the button that says Expand. 

Once expanded the image will be broken up into individual paths and groups. Simply ungroup the image and then you are free to change any aspect of the image using the tools within Illustrator. 

Individual Paths.

Ungroup The Image.

Individual Path Selection.

After following these simple steps our photo has transformed into a vector cartoon. Below is the result. 

Click to view in full screen.

I explain the process in far greater detail in the following video tutorial. 


Once completed our cartoon image can be used in combination with Photoshop to produce some amazing results. 

The following video shows you how to create the image seen at the beginning of this post from start to finish. 

In the video I mention a few textures that I downloaded from deviantart.com. Click any of the links below to download one of the textures used in the video.

Download - 2 Old Postcard Textures

Download - Whitewashed Grunge Textures

Download - Texture 13

Download - Texture 15

After a few minutes of experimentation. You should get a result similar to this image shown below. 

Click to view in full screen.


This is just a brief overview of the capabilities of illustrators image trace function. This particular function can be used for a wide variety of tasks, however today I just wanted to demonstrate its potential for converting photos into illustrations.

"Kaleidoscopic Psychoactivity" - 9/21/16 - [Photomanipulation]

The initial idea behind this photo was to create a colorful poster using the same techniques used in last weeks image

This particular composition is made up of two photographs combined together, along with extensive amounts of photoshop manipulations.

Take a look for yourself.   

I eventually plan on selling large prints of this image, so definitely let me know what you think.

If you have any questions on how the final product came to be, I would be more than happy to elaborate in a video tutorial. 

"Orange Mango" - 9/14/16 - Photo and Video Tutorial

After receiving positive feedback on last weeks photo, I decided to build on the concept and create something a bit more exciting.

The following image is the result of several hours of experimentation. The photo itself is made up of two exposures, one for the background and one for the bottle. Both of which were processed in Adobe Lightroom, and later combined in Adobe Photoshop. The splash effect was later added in the post production process, by liquifying the bottle and than adding several layer masks comprised of various paint splashes.

The final product is shown below. 

In addition, I have also produced a video tutorial detailing the process for creating the splash's. 

[Photo] - "Blue Beer" - 9/5/16

I spent most of the day testing out some new ideas for some lighting setups. The main goal was to use a setup that was mostly different to what I am used to in order to manipulate the background of the image. The following image is the result of todays experiments. Hopefully in the upcoming weeks I can use this technique to get some nice results. 

11 More Images Added to "Aqueous Motion - Volume 1"

On Monday I posted a small collection of five images titled "Aqueous Motion - Volume 1", today I have added eleven new images to the series. I mainly focused on perfecting the techniques used on Monday's shoot and i've learned quite a bit from doing so. If you need more information on the project itself feel free to check out Monday's post for more information. 

In the meantime enjoy the photos. 

New Photo Series - "Aqueous Motion - Volume 1"

After seeing quite a few examples online I decided to experiment with underwater ink photography. It took a while for me to find the correct ink to use in order to get the effect present in the images, but after a few hours of research I finally found the right kind of ink for the job. 

The following five images were created by dropping acrylic ink into a flower vase. I than captured the flowing cloud of ink by using a flash and a very fast shutter speed. After I went through about 100 test images and a few gallons of water, I managed to pick out these five as the best images. 

Im still experimenting with this technique, so expect more in the near future. 

Below are the five final images. Enjoy, and let me know what you think. 

[Photo] - "Gone and Still Forgotten" - Re Edit.

Recently Google has made the popular Nik suit of photoshop plugins free to download. I have been looking at this particular plugin suit for quite some time, and now that it's free I figured it's time to give it a try.  

I decided to re edit "Gone and Still Forgotten" to practice using the Silver EFX Pro plugin. 

The following image is the result. 

[Photo] - "A Splash Of Blue" - Final Edit

About a month ago I posted an image titled "A Splash Of Blue". I was not happy with the initial results of the image which has prompted me to revisit it a few times over the past few months. After re shooting the bottle I can now say that I am happy with the final results. 

Below is the final version of "A Splash Of Blue". 

[Photo] - "Strawberry Sundae" - 3/17/16

The following image is another shot for my upcoming senior portfolio. I decided to stray away from my current trend of photographing beverages, and focus on food photography. For this weeks project I figured I would try photographing deserts. The initial process of taking the image was a bit harder than I expected, mainly due to the fact that studio lights cause ice cream to melt a lot faster than normal. However despite the problems I had while shooting I am still happy with the result. 

Below is the final image, as well as some alternate versions. I am still having a hard time deciding which version I like the best so I decided to include the alternate versions. Feel free to let me know which one you like the most.  

Above: Final edit as of 3/17/16

Below: Alternate versions. 

[Photo's] - Experimenting With Macro Photography

I've been wanting to get into macro photography for quite some time now. The following images are my first attempts. Both photos were taken using a Canon 50mm 1.8 lens attached to the camera with a few macro extension tubes. As of writing this post I have not purchased a macro lens. I've found that the extension tubes tend to distort the image and produce results that are rather fuzzy. I can only get better with practice and who knows, perhaps i'll buy a proper macro lens in the near future.

As always any feedback is appreciated.   

[Photo] - "A Splash Of Blue" - 3/3/16

Here is another photo taken as a part of my portfolio evaluation class. 

I had a bit more trouble with this one than normal. I ended up with at least three versions of this photo that I was not happy with. After getting some feedback from my professor I finally decided on this version, which was a lot different than my original idea. 

The entire image is a composite made out of at least five photographs. All the images were combined within Photoshop to create the final effect. 

As always, any feedback is greatly appreciated. I am currently looking for ways to improve this one, so it will likely change a few times before the semester is over.